Wi-Fi Configuration Guide
To manage the Raspberry Pi’s network settings, use the nmtui text-based interface.
You can configure the device in two ways:
Client Mode: The Raspberry Pi connects to an existing Wi-Fi network (like your home router).
Access Point (AP) Mode: The Raspberry Pi creates its own Wi-Fi network for you to connect to.
To begin, open the Raspberry Pi web terminal or connect via SSH. Launch the configuration tool by running:
sudo nmtui
How to Configure AP Settings
Use these steps to change the name (SSID) and password of the Wi-Fi network created by the Raspberry Pi.
Select
Edit a connection.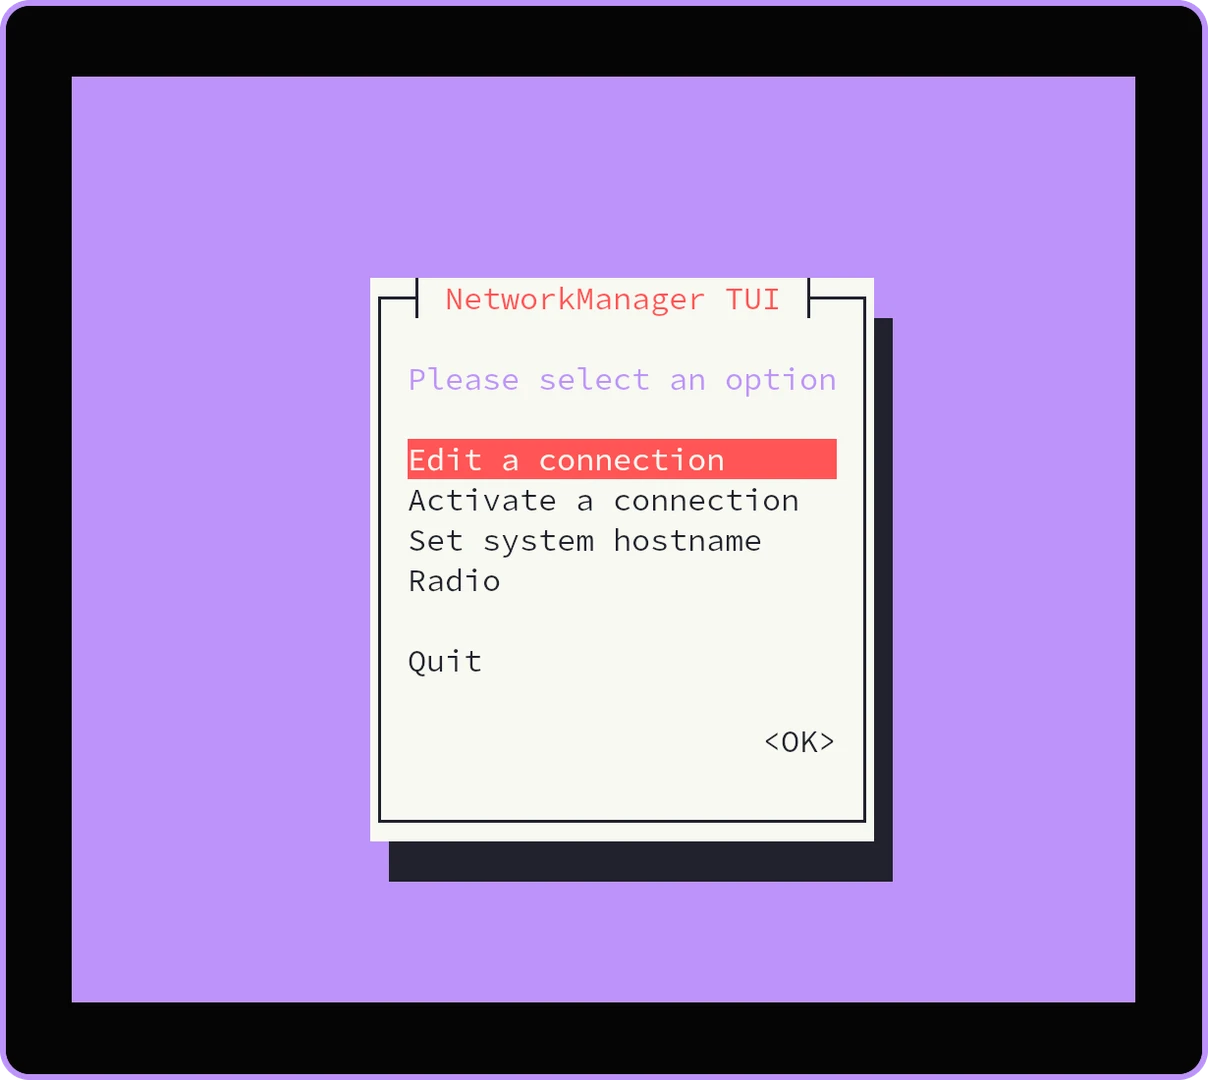
nmtui main menu
Select the access point profile and select
Edit.By default, this profile is named
clover2. If you do not see it, selectAdd→Wi-Fi. In theModefield, selectAccess Point, and in theIPv4 CONFIGURATIONsection, selectShared.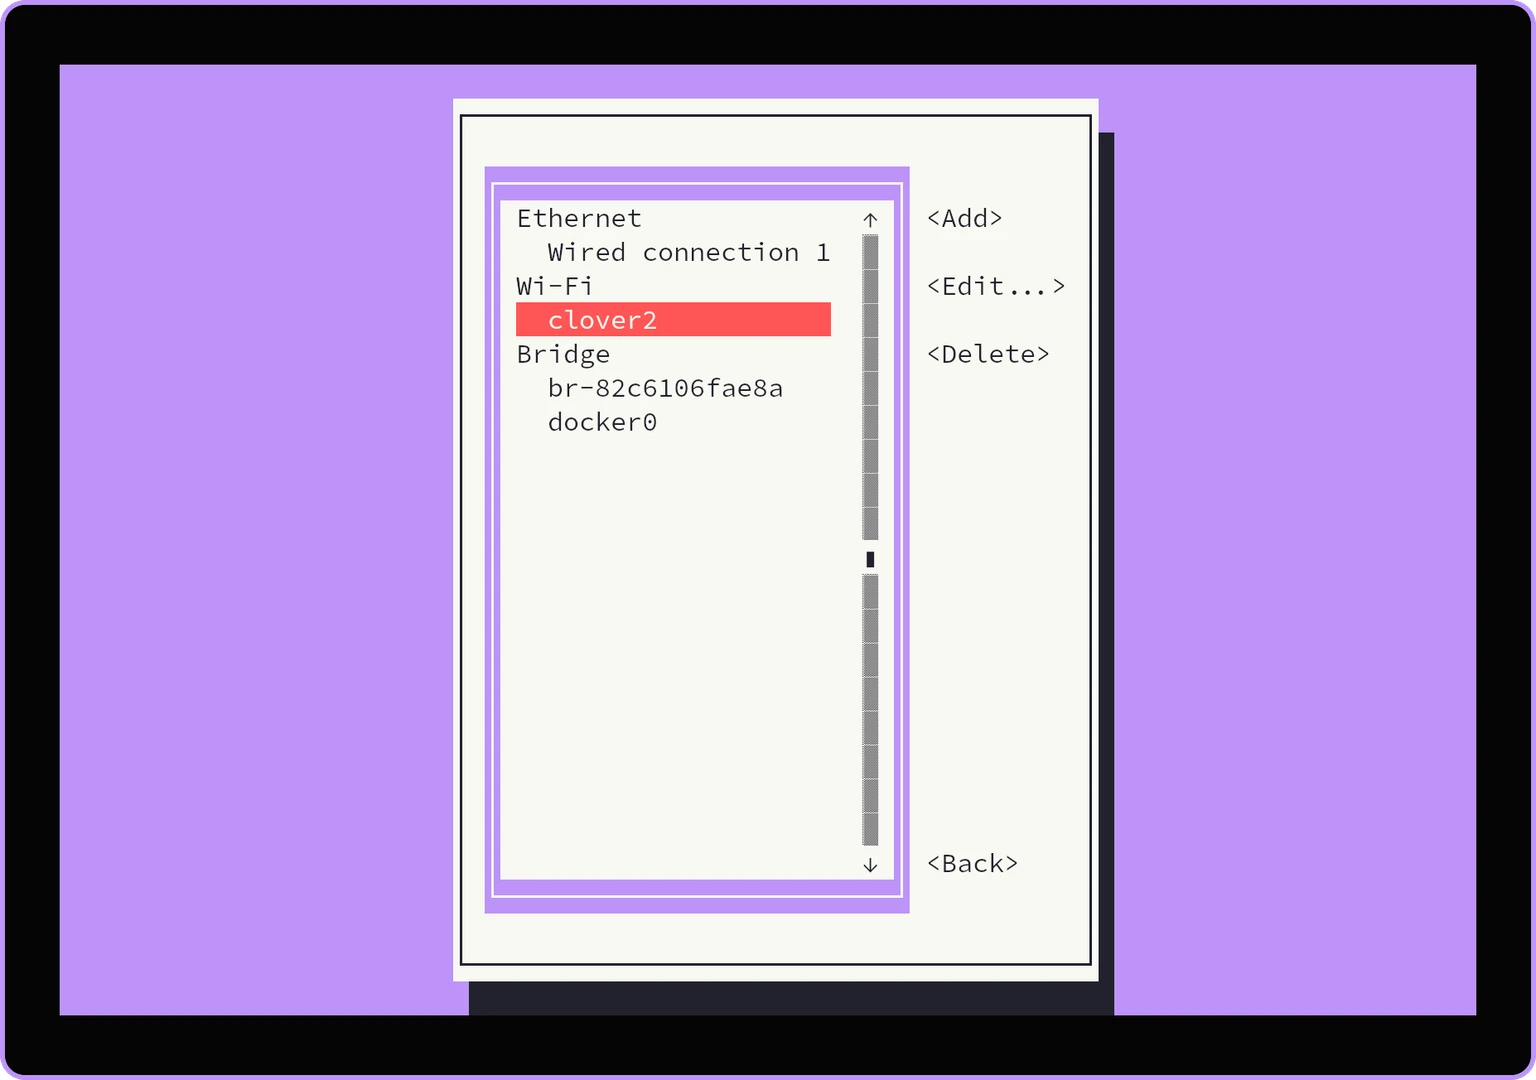
Selecting AP
Enter your desired network name in the
SSIDfield and a password (minimum eight characters) in thePasswordfield.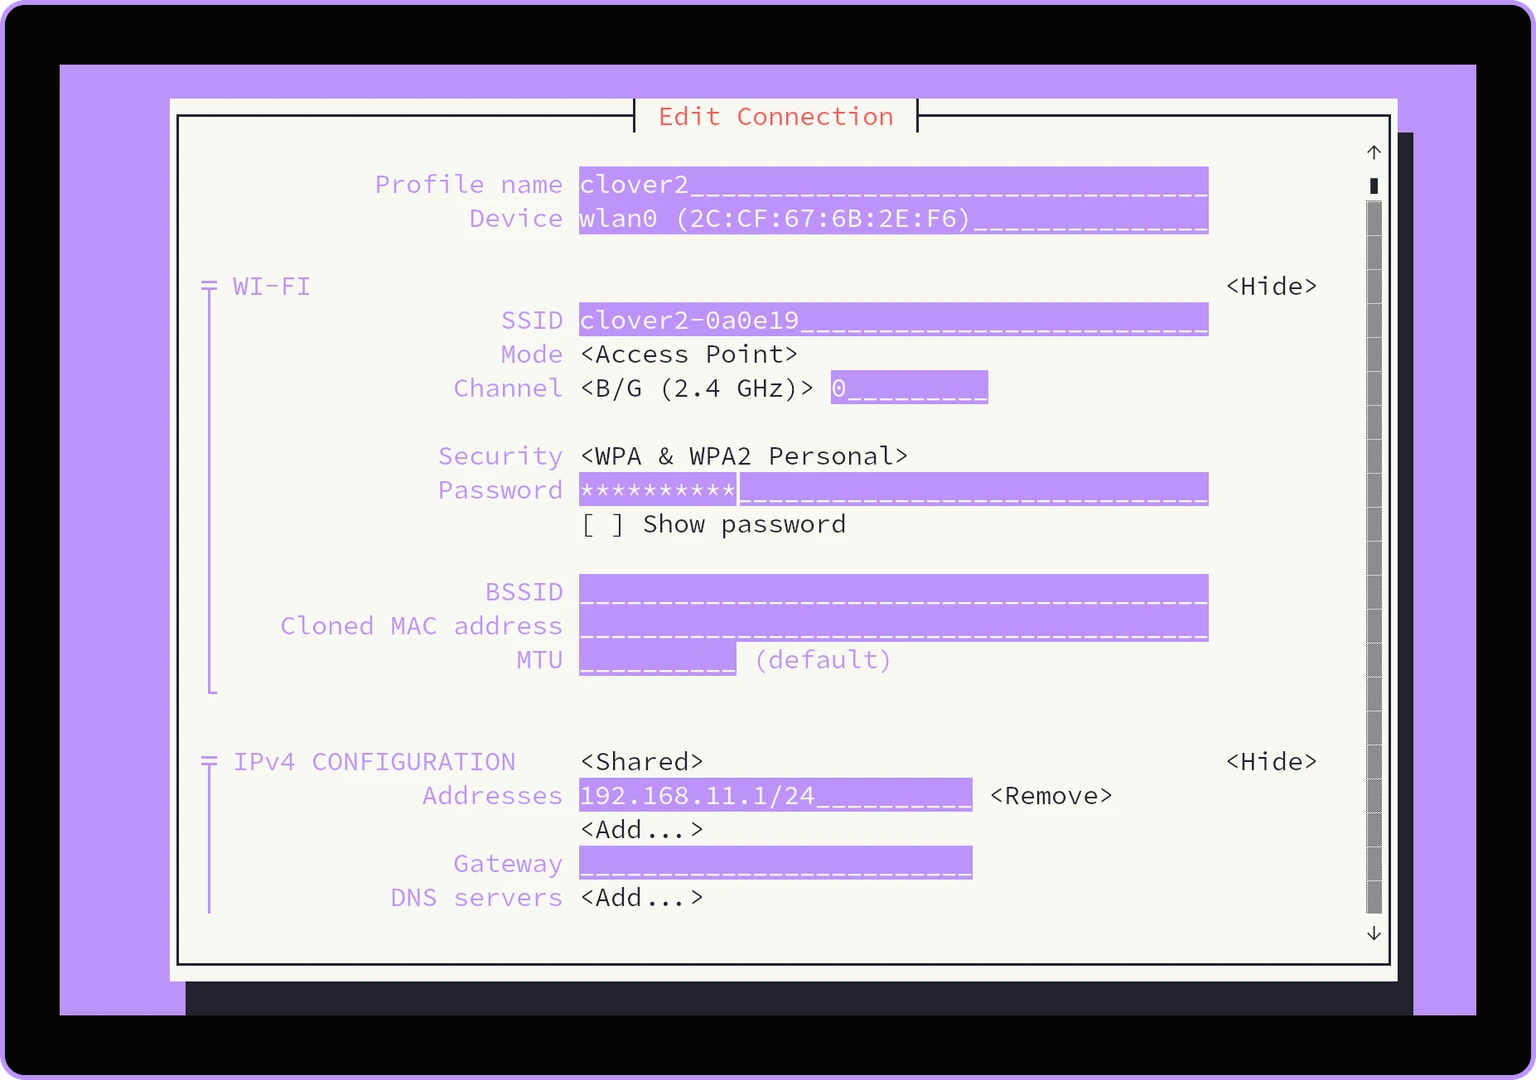
Editing AP
Select
OK, thenBackandQuit.Restart the NetworkManager to apply changes:
sudo systemctl restart NetworkManager
Important
If you are currently connected to the Raspberry Pi via its Access Point, switching to Client Mode will turn off the AP and interrupt your SSH connection. Ensure you have an alternative way to access the device (such as a physical connection or another network) before making this switch.
How to Switch to Client Mode
Follow these steps to connect the Raspberry Pi to an external Wi-Fi network.
Run the
sudo nmtuiand selectEdit a connection.Select
Add.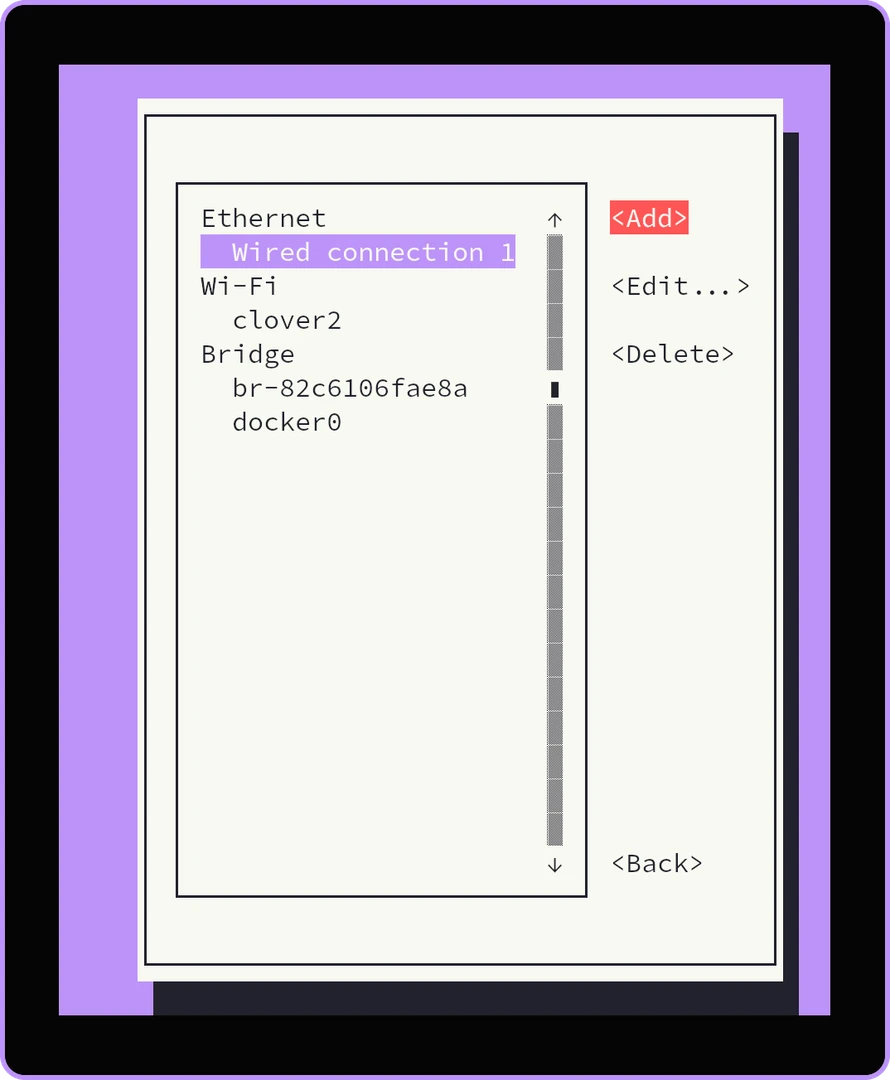
Adding connection
In the
New Connectionwindow, chooseWi-Fi.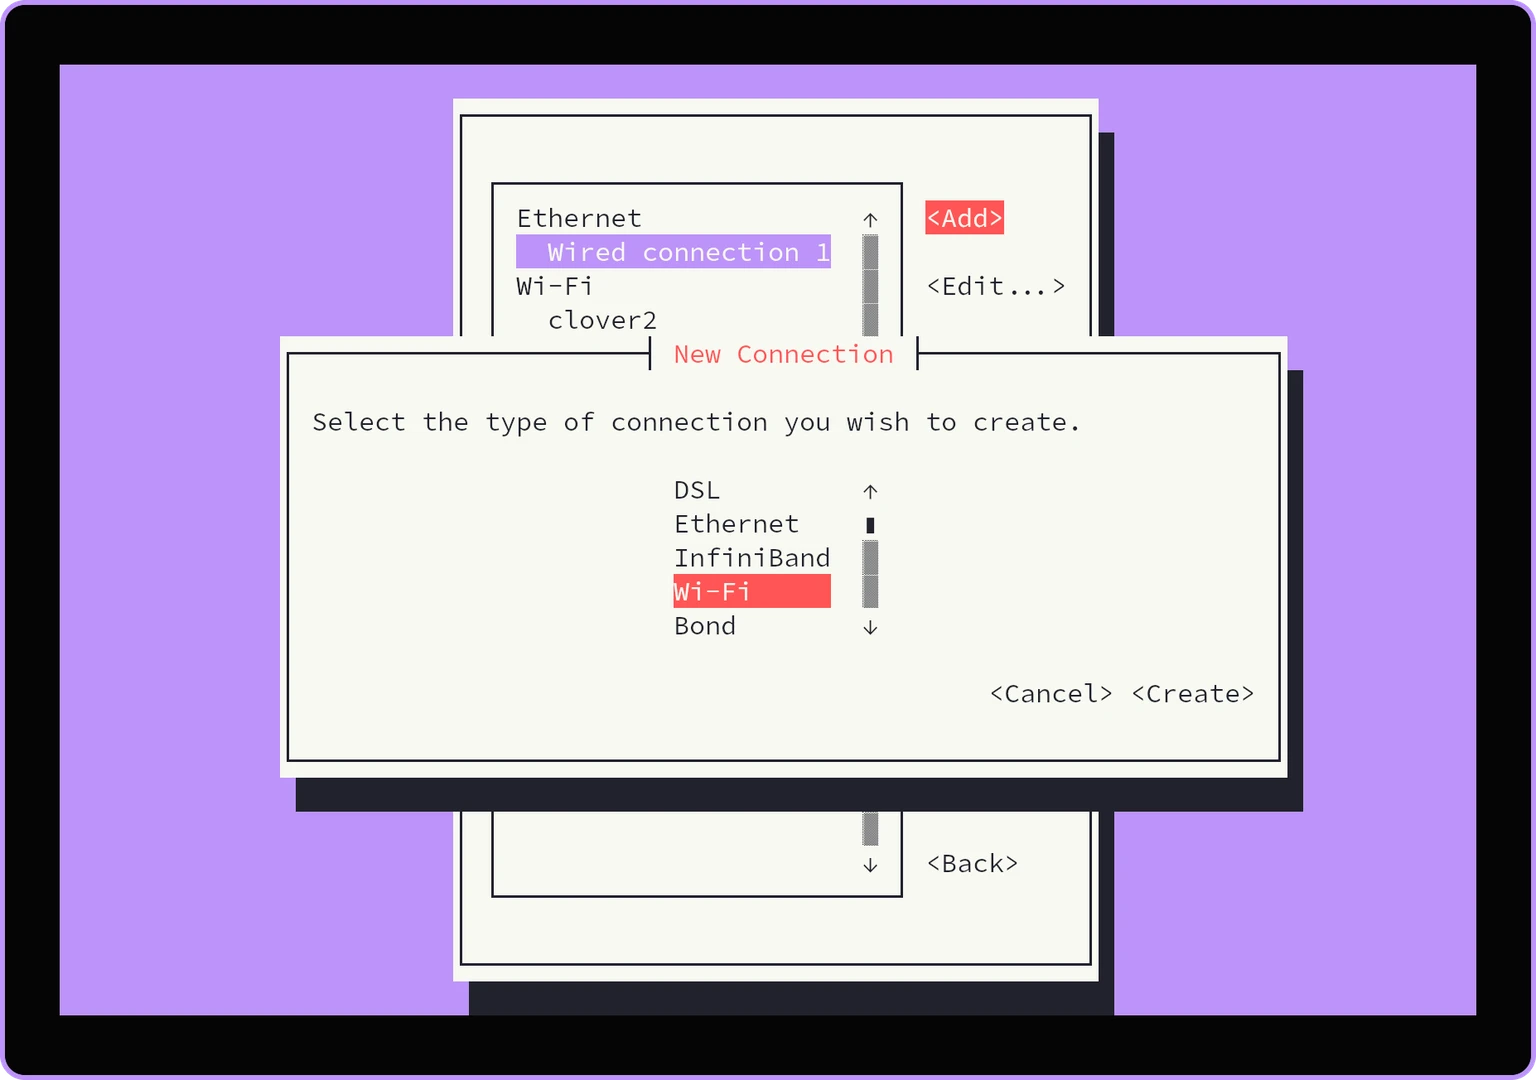
Selecting Wi-Fi
Navigate to the
Securityfield and select your network’s security type (e.g.WPA & WPA2 Personal).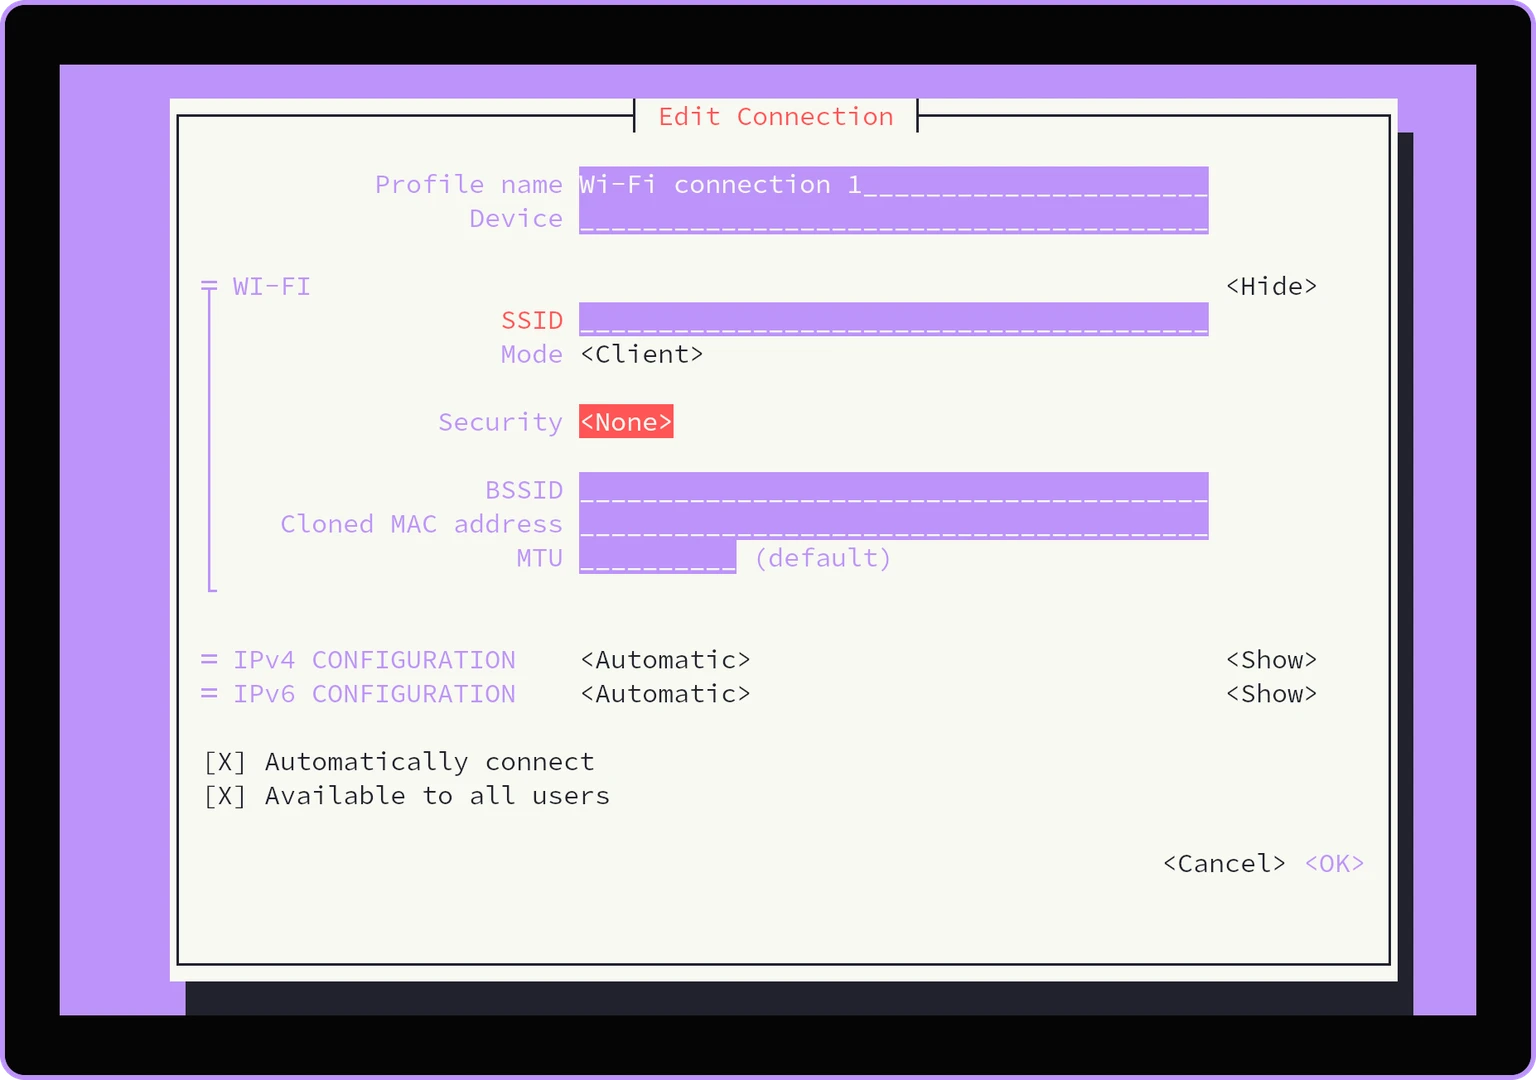
Selecting security type
Enter your network name in the
SSIDfield and your password in thePasswordfield. SelectOK, thenBack.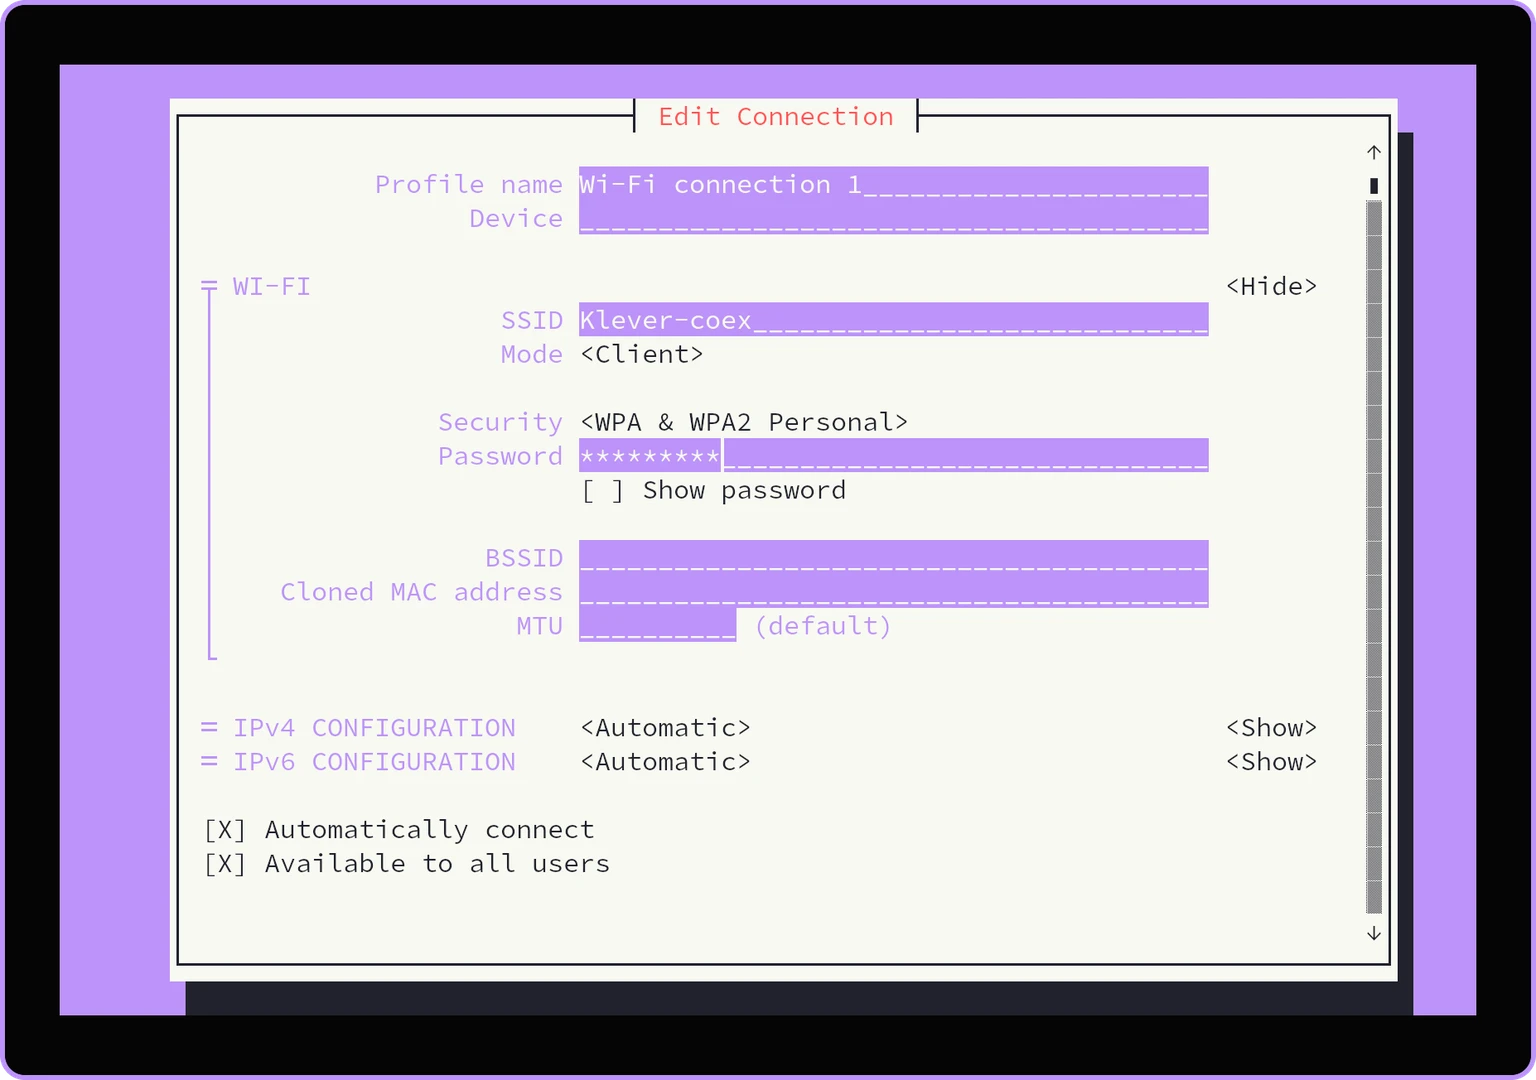
Entering credentials
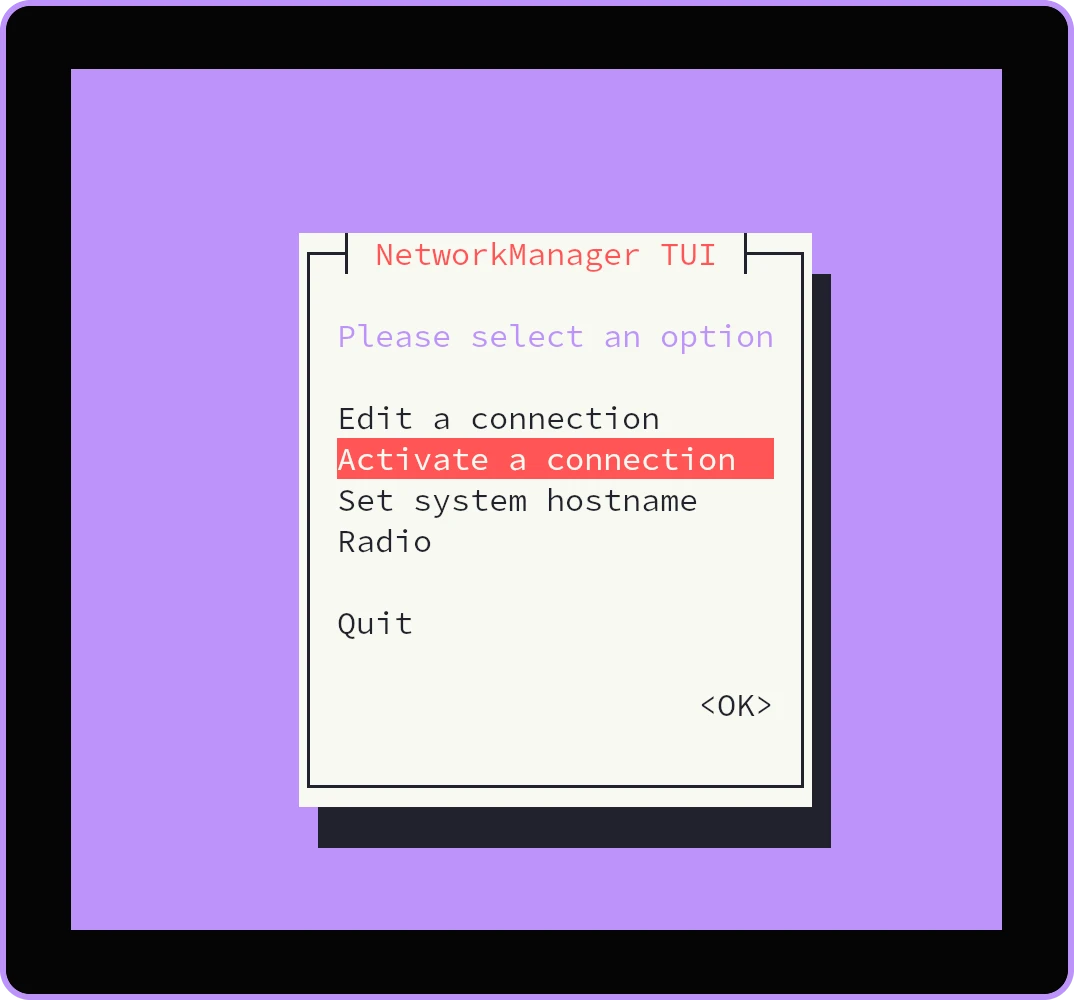
Select
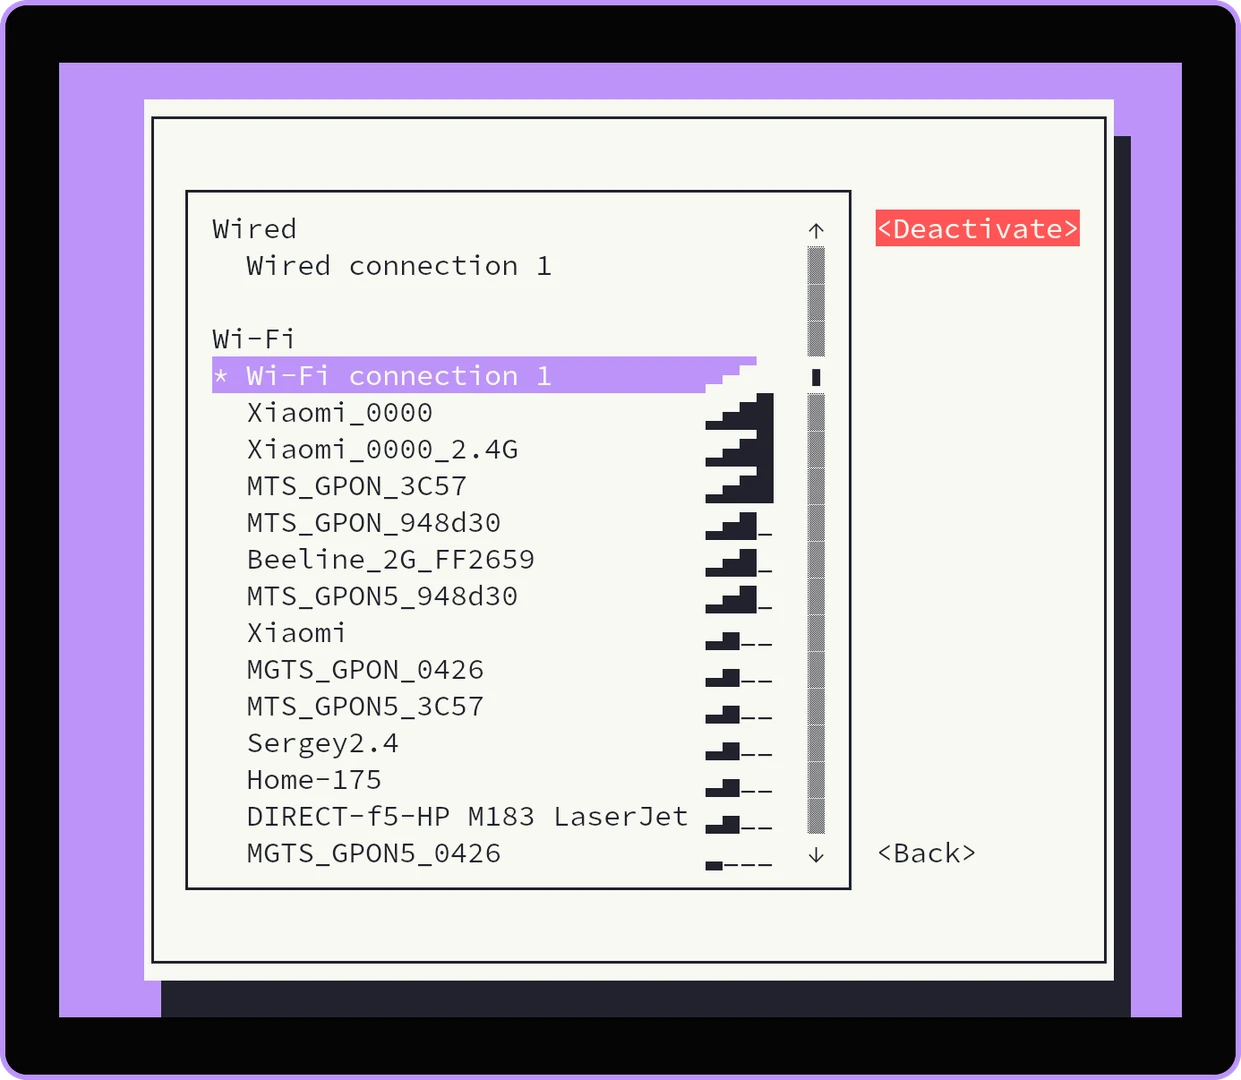
Activate a connection. Locate your new profile in the list and selectActivate.Note
The screenshot shows the profile Wi-Fi connection 1 as an example.
If your new profile does not appear in the list, exit
nmtuiand restart the Network Manager:sudo systemctl restart NetworkManager
Then, relaunch
sudo nmtui, go toActivate a connection, and activate the profile.
Activating client
Note
Once connected to a Wi-Fi network, the Raspberry Pi’s IP address may change. To reconnect via SSH, you will need to find the new IP address, which can typically be found in your router’s connected devices list.
How to Switch Back to AP Mode
To stop acting as a client and return to AP mode:
NetworkManager Profiles
All connection profiles are stored in the /etc/NetworkManager/system-connections/ directory. While you can manage these manually, it is recommended to use nmtui for all modifications.
If the wlan0 interface is managed by NetworkManager, do not attempt to configure it simultaneously using dhcpcd.conf, wpa_supplicant.conf, or a separate dnsmasq configuration file. Doing so may cause network instability.